Photo Notes
Below are five screen captures from Photoshop. They show how to crop and resize a photo for use in your Project 1 assignment.
Follow these instructions to receive full credit for the photo portion of Project 1.
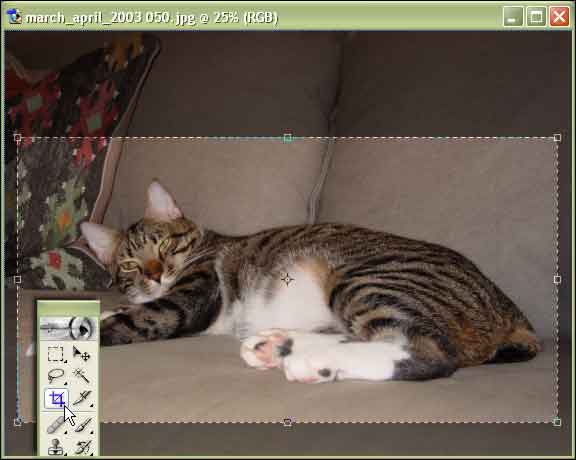
Above: (1) Open the photo file in Photoshop. Use the Crop tool (lower left) to drag a horizontal box around the subject. Double-click inside the crop box to complete the crop.
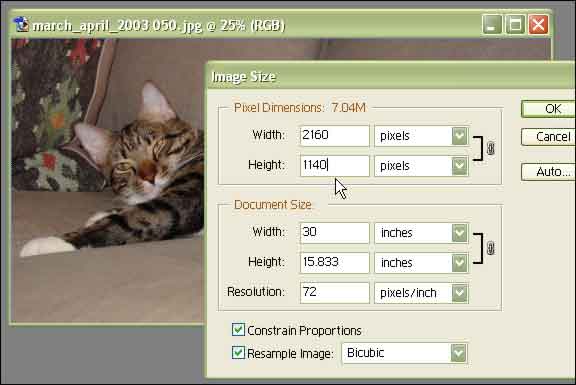
Above: (2) Open the Image menu and select Image Size to open this dialog box.
Check to see that Resolution is 72. If not -- change it.
In Photoshop CS3, at the bottom where it says "Resample Image," there is a different menu. Select "Bicubic Sharper (best for reduction)" in Photoshop CS3.

Above: (3) Make sure the width and height are linked (right). If you don't see the little chain link, check the box labeled "Constrain Proportions" (previous illus.).
Then change the height to 400 pixels. Click OK.
For THIS ASSIGNMENT, the photo MUST be exactly 400 pixels in HEIGHT.
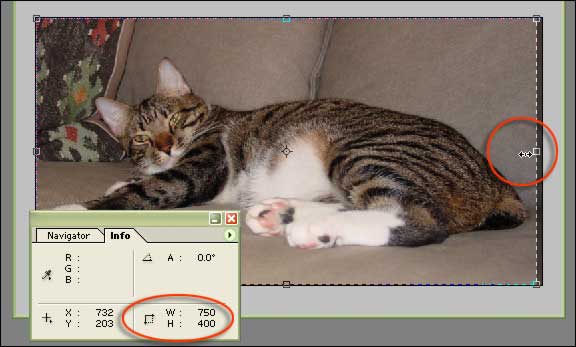
Above: (4) If your photo is wider than 750 pixels AFTER you set the height (previous illus.), then crop it again. Use the Info palette (get it from the Window menu) to see how wide your crop box is. Change the width of the crop box by dragging the side handle (circle, right).
For THIS ASSIGNMENT, the photo MUST be 750 pixels in WIDTH -- or LESS.

Above: (5) Open the File menu and select Save for Web & Devices. This dialog box will open. Change all the settings to match those shown here, and then click Save.